What do toothache, a crazy schedule and less than perfect health result in? Well, very little use of an excellent camera. And a criminal neglect of a blog. So now, we have resolved the issue of why there have been no updates on this blog for a while - profound apologies for the same, really - let's get on to tackling some terms that almost everyone toting a DSLR uses. Beginning with one that has always, always, scared the Bejeesus out of me:
Aperture.
It sounds pretty intimidating, truth be told. At least to me - I mean, it sort of amalgamates "apparatus" and "torture."
What it actually is, is, well, a HOLE.
Yep, the almighty "aperture" is nothing but a small opening in the lens which regulates how much light gets through to the sensor, and....
Hang on. Jargon alert again.
Sensor!
What the blazes is a sensor? Everyone keeps yakking about them too, sounding very knowledgeable when they do so - heck, even camera phone manufacturers go on and on about them.
Well, truth be told, a sensor is nothing but the digital substitute for camera film! Yes, that is all, really. Just as in the past, images were formed on camera film, they are now formed on the sensor. Yep, as simple as that. No, do not get too obsessive about it right now.
Which brings us back to the aperture. Yes, it is a hole inside the lens that determines how much light hits the sensor to form the image. It is a bit like a tap in the lens that determines the flow of light - make the aperture big and more light gets in, make it smaller and very little does.
And yes, you guessed it, the amount of light that hits the sensor for a period of time is referred to as "exposure. " Simple.
How long you keep the aperture open is determined by shutter speed. And just how wide the aperture is kept open is shown by what is known as f-stops. Really, that's all there is to it.
As a rule, you need fast shutter speeds in bright environments - where not too much light is needed - and slower ones in low light ones. Shutter speeds are generally expressed in terms of percentage of a second - 1/60 is 1/60th of a second, 1/250 is 1/250th of a second. The rule of thumb - if it is dark, just stick to the smaller number in the denominator, and the larger one if it is light enough.
Last stop for the day are f-stops, also referred to as f-numbers by some pundits (the ones with huuuuge cameras). These basically measure how wide the aperture opening is. They are expressed in fractions again (what IS it with photographers and fractions?) - f/2.8, f/4, f/5.6, f/8 and so on. The smaller the number, the larger the aperture opening. The larger the number, the smaller the opening. So the larger the number, the lesser the light that gets in.
Grand summary: Aperture is a hole in the camera lens that lets light on to the sensor, the area where an image is formed. Just how wide the aperture is open is determined by f-stops and just how long it remains open, letting light in, is determined by shutter speed. In the case of both f-stops and shutter speed, less in the denominator is more - the smaller the f-stop number downstairs, the larger the aperture opening, and the smaller the denominator in shutter speed, the longer the aperture remains open to let light in.
Makes sense? Am still working out the less is more equations in my head. Will be tackling them again and again in the entries that follow. But egad, enough for now. Hope this helps. Hope also to be more regular on the blog henceforth!!
Thursday, November 10, 2011
Tuesday, November 1, 2011
Day 9: Shooting in the dark lessons, courtesy Diwali
They might call Diwali the Festival of Light (incidentally, that is the reason why this blog entry is coming after a bit of a gap), but the fact is that getting enough light to take pictures during the festival can be one heck of a pain. That said, when you DO get shots right, you end up with stunning results, thanks to the low, slightly golden light of the diyas that mark the occasion. See sample:

Of course, I was all ready with my new-found DSLR (the Canon EOS 600D, in case you have forgotten). Of course, I took lots of shots. Of course, I messed most of them up.
But, ah - silver lining: some of them did come out all right. After considerable analysis (well, more like "HOW did this happen" screaming), I decided that the festival of light had taught me a few lessons about low-light photography. I am sure there are more to be learned, but as of now, I think that if you are out at night with not too much light around, you should keep the following in mind:
Use Program Mode
I talked about not using Auto Mode when it starts getting dark in an earlier post. Well, in spite of being the nutty DSLR newcomer that I am, I was pretty much right in this. All the shots I took in Auto mode turned out way too bright. What is wrong with that? Well, for one - you want shots taken in the night to at least LOOK like they were taken when the sun was down, eh? And for another, because if you are going to be using Auto mode all the time, why bother with a DSLR in the first place? Of course, if you know more about photography, you will know exactly what mode to use for which shot, but if you are just getting to grips with it - rule of thumb: stick to Program mode.
Drive up the ISO
One of the advantages of using the Program mode in the DSLR is that although the camera still handles most things by itself, you can mess around with the ISO settings. Remember ISO? Yep, the same which you can tweak to higher levels to get better shots in the dark. Well, my recommendation would be to keep it at around 1600 if you want decent shots that make the most of the clay lamp lights of Diwali and even ramp it up to 3200 when it gets really dark - there is a helpful button right behind the shutter button marked "ISO" to let you do this. Take my word for it - the results will be pretty decent. Take a look: (a word of caution - do NOT overdo it, else you will end up with some really funny looking pics)


Kill the Flash
One of my photographer friends told me that one part of a DSLR most newcomers should never use is the flash. "It mucks up night shots totally," he snarled. "Yes, it will get you the picture. But not in the way you shot it." Seems a bit mystical? Well, the fact is that try taking a shot with the flash enabled in the dark and the chances are that you will get a nice bright picture. But, as we pointed out, nights are NOT nice and bright. They are dark and dim. So yes, a flash is a very good option if you want people to find out what it was that you were shooting but if you want to show them what YOU saw, keep the flash down please. The following two shots were taken in succession. One used a flash. One did not. Draw your conclusions, folks.


Steady, steady
You HAVE got to keep your hands steady while taking shots in low light conditions. The darker it gets and the farther away you subject is, the more likely it is that the camera will take a bit longer to take a shot - and that results more often than not in a blurry picture. If you are going to take plenty of shots from a bit of a distance (well, anything more than 6-7 feet really), I would advise you to get a tripod. Yes, I have a tripod. No, I did not use it. See what happened!

Get up and close, whenever possible
I am sure you have had better results than me in this regard, but I personally found that shots taken from close range tended to work a whole lot better when the lights dimmed. Yes, am sure there is a way around that, but I have not really worked it out yet, so will tell ye this in my best faith - for best results in low light, try and get close to the subject. I was literally about a foot away and on my stomach on the ground when I snapped this diya - ISO was all the way up to 3200. But the results, ah...

The reflect light effect on faces
One of the biggest things I learnt this Diwali was simply that if you got people close enough to light to get the light reflected off their faces, you would end up with some really decent shots, rather than if you tried shooting them with the light sources (lamps, firecrackers, etc.) in the picture themselves. Seems like common sense? Ah, I just figured out. The results were not too bad really:

Keep checking results!
One of the great advantages of using a digital camera is that you can keep checking the results of your clicks on the LCD on the device. I wish I had done so more often. Unfortunately, I got carried away in an orgy of clicking, and often went on to take shots that were useless. A simple check on the previous shot would have told me that the light was not good enough or that things were getting blurry. Again this is really common sense but when the lights are low - do try to check your shots after you snap them. It does not take too long and ensures that you do not keep shooting duds!!
So, those are the photography lessons I learnt this Diwali. No, not earth-shattering but I daresay they will help me take better shots the next time the festival of light comes calling. Of course, lots more to learn. Will keep writing. Bear with me.

Friday, October 21, 2011
Day 8: Want a great shot? Just look...up!

All right, so sue me - this is not really a DSLR camera trick, but it is so amazing that I guess I had to really write about it. And the credit for it really goes to one of my friends who saw me struggling with my DSLR, trying to take some amazing pictures. Incidentally, has it ever struck you how rarely someone with a camera tries to take an ordinary shot? It always has to be a special picture, even though you have near infinite options on a digital camera
I like to call it the quest for perfection. Judging by the patient looks of some of my more DSLR-savvy friends, it was more like "pie-eyed idiocy." Finally, one of them could take it no more and said, "You want a great picture? Just look up! What do you see?"
"The underside of a crow" would have been too literal and maybe even irrelevant, so I gave the standard answer, "The sky."
"Exactly! Just get lots of it into your picture. It will give you a great shot seven times out of ten!"
"That easy? But which mode do I use: Program, auto..."
"Keep it simple. Do it on auto. Just get lots of sky in. Preferably without wires. "
"Oho, what ISO? When night falls..." (well, I like dropping acronyms to show that I CAN use them...)
He was unimpressed by my display of punditry. "Stuff that, do it in daytime and if push comes to shove, late in the evening. NOT IN THE NIGHT! And for God's sake, stop fiddling with those dials. You are making me feel sad for the bloody camera!"
I sulked for a while, and diddled with some buttons for a while, just to show that I was master of my own DSLR (even though I knew next to nothing about it). Then I decided to try it out the advice.
It did not half work.
No matter what the subject - birds or buildings - they ended up looking a lot better just because of that wonderfully blue canvas behind them. Mind you, the wires WERE a pain. See for yourself:


Best of all - this formula would have worked with just about any decent camera. Though, of course, a DSLR would generally give better results because of its better lens quality - all the above shots were taken with my Canon EOS 600D.
All of which proves, that for all the dials and bells and whistles - some aspects of photography can at times be incredibly simple. Even with a DSLR.
Mind you, I still do not know what THAT button does, and for that matter, the other one, and that little wheely-thingy...but that is a story for another day. And another blog entry!
Tuesday, October 18, 2011
Day 7: Unravelling the "mm" mystery in lenses

It was Karva Chauth a few days ago - a day when married women in parts of India fast all day long for the well-being of the chaps they married. The beneficiary of this non-eating generally rewards his better half with some sort of ornament or item of clothing.
I gave Anupama (that's the wife, my life, my friend, my...well, well...you get the idea) a 50mm camera lens for her Canon EOS 1000D DSLR camera. There was shock and scandal in the traditional circles - jewellery and clothing are supposed to be the giveables on these occasions, not camera lenses. But fortunately for me, Anu loves her photography and has been clicking away happily with the lens ever since.
However, in technological circles, I have been asked why I picked the 50mm lenses. And in slightly less technical ones, what the devil is this chakkar (mystery) about mm when it comes to lenses - we keep seeing these 18-55mm, 50-200mm figures on lenses.

Well, the answer to the first question is: because I know Anupama wanted a 50mm lens. The answer to the second one is...ah...a tad more complex.
As I understood it, the "mm" in the lens refers to the focal length of the lens. Which of course, begs the question as to what the devil is this focal length. Well, it is the distance between the lens itself and the sensor of the camera on which the image is formed (it used to be the film in the good old days). Now, without getting TOO complicated and talk of focusing on infinity and whatnot - here's a simple rule of thumb to be followed by DSLR beginners - the higher the focal length number, the greater the magnification of the lens. Simply said - you can zoom in more with a lens that has a bigger "mm" number parked on it. On the other hand, the lower the figure, the wider a perspective you can get.
So, keeping things simple - if you want to shoot a wide landscape, go for a lens with a relatively smaller mm figure on it, while if what you want to shoot is some distance away, go for the higher mm figure ones.
A very rough break-up of focal lengths would be in this manner:
- 10-35 mm: generally called wide, ultrawide and fisheye lenses. Great for architecture and landscapes
- 35-70mm: Generally considered normal. All right for general, impulse snaps without too much fuss.
- 50mm: This is widely accepted as being close to what the human eye sees. Great for portraits.
- 75-135 mm: We are getting into telephoto lens territory here. The zoom-in element starts coming.
- 135-300mm and greater: Very telephoto territory. The stand from a distance and deliver zone.
So there ye have it - the mm mystery in lenses as per Yours Truly. A trifle oversimplified and not entirely technically correct, I suspect, but kind of handy, if you are a DSLR beginner. Like I am. Will reveal more as the days pass, as the stripper said to the oily Sheikh, but as of now this is what I think I know of the mm chakkar.
Now, excuse me, I have to try and convince Anu to let me use that lens on MY EOS 600D.
Sunday, October 16, 2011
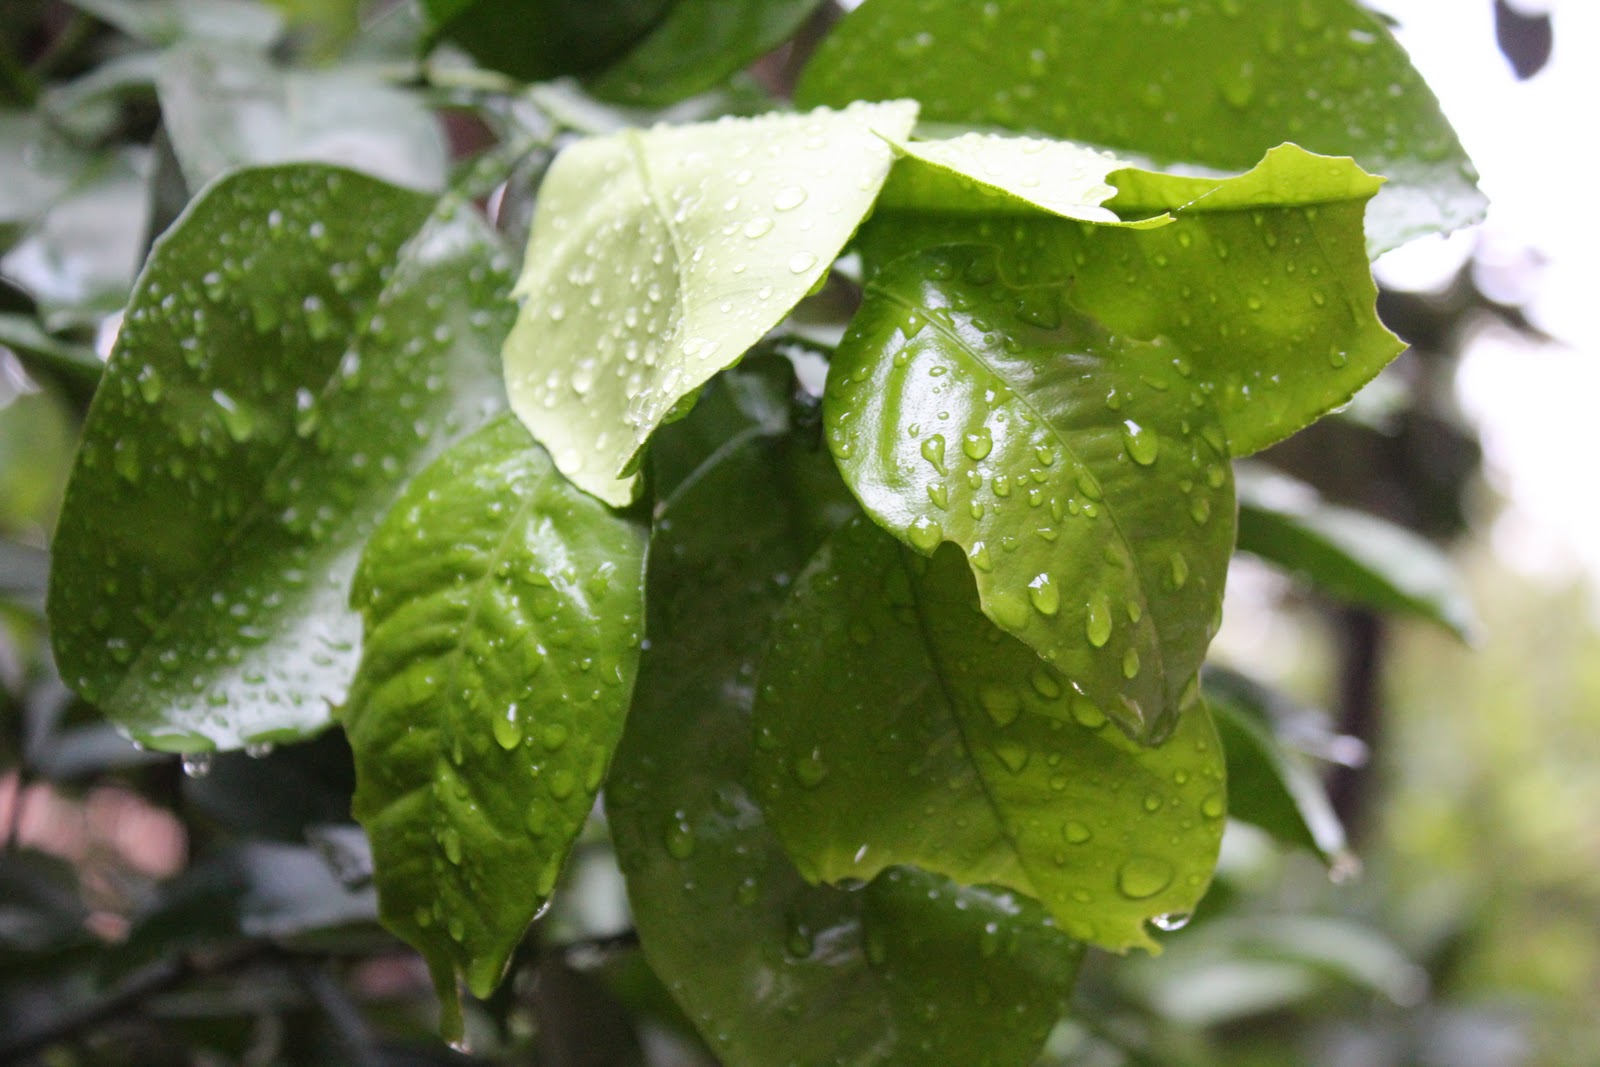
Day 6: Macro - the flower power mode

Girls love them, Wordsworth wrote poems about them, they make supremely good pictures...there is something about flowers, I guess. But clicking them can be a bit of a problem, as any person who has tried to take a picture of these nature's bloomers will tell you. Getting too close can blur up matters and getting too far means getting all sorts of unnecessary additions in the picture, including grass, roads, bypassers, et al.
Of course, there IS a way to tackle this. One that is appropriately indicated by a flower-like (well, to mine camera-uneducated eyes, it did seem flower-like) icon on your camera - the Macro mode.
No, I do not quite know how the darned thing works, but its specialty is that it lets you get real close to a subject and still take very clear and sharp pictures. All of which makes it inch-perfect for those times when you want to click flowers, raindrops on leaves, ladybirds sauntering on plants and the like. In fact, here is a rule of thumb - if what you are trying to capture is very small, just switch the camera to macro mode, get within a some inches of it and have a go. With flowers, I would recommend a foot or more. Worked fine with the Canon EOS 600D.
I had a stab at it, mainly with raindrops (well, I like them!!) and the results are there for ye to see.


Monday, October 10, 2011
Day 5: Auto mode when the lights are low...er...no!
One does and learns, the wise men say and I certainly can see their point. As I had pointed out a few days earlier, I have been basically using my Canon EOS 600D DSLR in auto focus mode, letting the camera in effect decide what was good for me. However, after yesterday's talk of ISO and how a higher ISO worked better in relatively low light areas, I decided to try a bit of shooting while Anupama (that's my wife and resident photography wizard) and I were driving down to NOIDA from Delhi.
Now those who know the area will know that there is a large idol of the Hindu god, Lord Shiva, on the opposite side of the Great India Place (GIP) Mall in NOIDA. As luck would have it, our car was stuck in a small traffic jam just about a hundred yards from the idol. We could see the head of the idol quite clearly above the traffic and the city lights. I took out the camera, which was in auto mode, and took a snap. The flash went off pronto and the result was, well, not the greatest. Here, see for yourself (you can click on the image to see a much larger version):

Now, this would clearly not do. So I decided - very bravely - to shift to Program mode (marked by a P on the mode dial) with a higher ISO (800 in this case). I took a deep breath, and snapped - and the result frankly surprised me. There you go: (again, you can click on the image to see a much larger version)

As you can see, the image is much sharper and there are no blurs. All of which teaches me two lessons:
1. When the lights go down, perhaps auto mode is not REALLY the way to go
2. Boy, I do need to look more into this ISO and Program mode thing, especially for shooting at night
And, to use Steve Jobs' immortal expression, one more thing - geez, NOW I know why people are so crazy about DSLR cameras. I have never take a shot of that kind with my Nikon P100, which was a very decent prosumer, but was never capable of things like THIS.
Sunday, October 9, 2011
Day 4: Jargon busting: What the blazes is ISO?
It has been a while (almost a week) since I used my DSLR, thanks to a whole flurry of activity (not least the passing away of Steve Jobs, one of my idols). And when I got back, brandishing the camera with ill-justified confidence, the first thing one of my friends told me was "Ah, your DSLR?Awesome. You can play around with the ISO settings now and get great pictures."
Which was wonderful to know. Yes, I could now play around with ISO settings. Except that I did not know WHAT an ISO was or why I should be bothering about its setting. It was one of the words that showed up on the menu screen of my EOS 600D, but I did not know why it mattered.
Well, after a bit of a knowledge session with a few gentlemen who know photography, I think I might have the answer.
Evidently, ISO was a term that originated in the time of film cameras and measured the film's sensitivity to light. Well, not too many people use film now, but ISO speed (often shown in terms of 100, 400, 800 - remember those figures you used to see on camera films) is a measure of how sensitive your camera's image sensor is to light. All right, I know this is more jargon and I promise to talk about image sensor next. But in very simple terms, the higher the ISO, the lower the light conditions in which you could go about snapping pictures and get results. Similarly, if the light conditions are good, you need a low ISO.
In Auto Focus mode, the camera pretty much determines the ISO speed on its own, so you do not need to worry too much about it. But then heck, if you are going to be using the camera in Auto Focus mode all the time, you do not really need a DSLR. In fact, tweaking ISO settings is a lot easier in DSLRs.
There are no hard and fast rules about what ISO speed works in which conditions but a few rule of thumbs, according to the worthies I talked to, are:
Just remember one thing, the higher your ISO speeds go, the more "grainy" your images are likely to get - that is the price you pay for more sensitivity to light. The lower the ISO speed, the clearer your pictures are likely to be.
Ah, so THAT is why so many good photographers prefer to shoot in daylight!Now to try it out. Stay tuned. I am going out of Auto Focus mode.
Which was wonderful to know. Yes, I could now play around with ISO settings. Except that I did not know WHAT an ISO was or why I should be bothering about its setting. It was one of the words that showed up on the menu screen of my EOS 600D, but I did not know why it mattered.
Well, after a bit of a knowledge session with a few gentlemen who know photography, I think I might have the answer.
Evidently, ISO was a term that originated in the time of film cameras and measured the film's sensitivity to light. Well, not too many people use film now, but ISO speed (often shown in terms of 100, 400, 800 - remember those figures you used to see on camera films) is a measure of how sensitive your camera's image sensor is to light. All right, I know this is more jargon and I promise to talk about image sensor next. But in very simple terms, the higher the ISO, the lower the light conditions in which you could go about snapping pictures and get results. Similarly, if the light conditions are good, you need a low ISO.
In Auto Focus mode, the camera pretty much determines the ISO speed on its own, so you do not need to worry too much about it. But then heck, if you are going to be using the camera in Auto Focus mode all the time, you do not really need a DSLR. In fact, tweaking ISO settings is a lot easier in DSLRs.
There are no hard and fast rules about what ISO speed works in which conditions but a few rule of thumbs, according to the worthies I talked to, are:
- In bright daylight, an ISO speed of 100-200 works fine
- If it is evening time or overcast, an ISO speed of 400-800 should be handy
- If it is night or light conditions are not the greatest, an ISO speed of 1600 would be needed.
Just remember one thing, the higher your ISO speeds go, the more "grainy" your images are likely to get - that is the price you pay for more sensitivity to light. The lower the ISO speed, the clearer your pictures are likely to be.
Ah, so THAT is why so many good photographers prefer to shoot in daylight!Now to try it out. Stay tuned. I am going out of Auto Focus mode.
Subscribe to:
Posts (Atom)